

As you return to your living room, turn on the light switch and are momentarily blinded by the six 100-watt-equivalent LED bulbs’ brightness. That kind of lighting is perfect for an operating room but not for an evening in your comfy chair. You may have heard of dimmer switches and would like to get one but are renting and don’t want to deal with rewiring. Good news, there are several electric-free ways to dim LED lights, from inexpensive filters to smart bulbs – allowing you to adjust the brightness remotely. This article explains the different methods, how to use them, the money involved, and any safety hazards.
Quick answer: Dimming an LED lighting system can be done without the use of any dimmer switch. The best methods for dimming would be: (1) putting physical light dimming materials like LightDims sheets or diffuser films on the bulb or lamp ($3-$12); (2) changing your current bulbs to smart LED bulbs that have built-in dimming functions ($10-$50); (3) making use of plugs with built-in module dimmers in between the lamp and the power source; (4) switching to step-dimming bulbs that can be controlled with the flick of a switch ($8-$18); (5) getting a PWM controller for the LED strip lights ($5-$20); (6) using remote controllable dimmable bulbs ($12-$25); and (7) placing heat resistant diffusers over the lamp. Always ensure that your bulbs are dimmable, otherwise the non-labeled cheap LEDs can flicker, buzz, and burn out quicker than expected when dimmed.
This section will provide a general outline of all the methods of attaining the end. They are all useful in different situations, with some requiring no special tools to get the job done and others being fairly easy to create themselves or assemble with minimal effort.
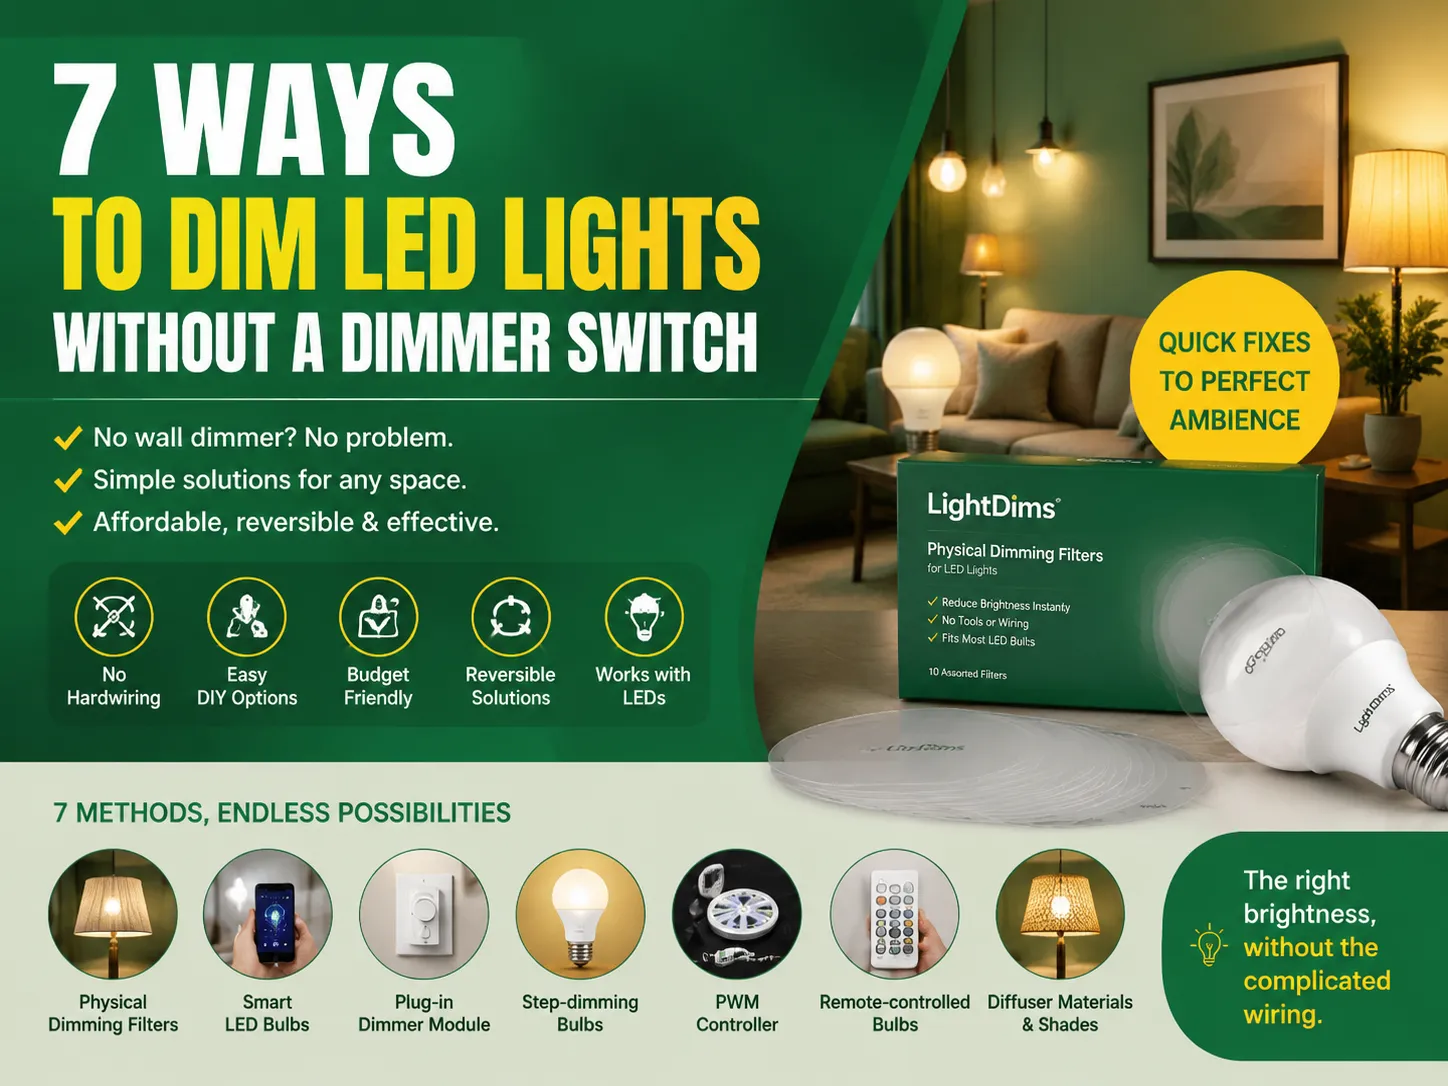
| Method | Cost | Skill Level | Best For | Reversible? |
|---|---|---|---|---|
| Physical dimming filters (LightDims) | $3–$12 | None | Quick fix, small fixtures | Yes |
| Smart LED bulbs | $10–$50/each | Easy | Whole-room control, smart homes | Yes |
| Plug-in dimmer module | $12–$30 | Easy | Lamps, floor lights | Yes |
| Step-dimming bulbs | $8–$18/each | Easy | Existing wall switch, no wiring changes | Yes |
| PWM controller (LED strips) | $5–$20 | Medium | LED strip lights, DIY projects | Yes |
| Remote-controlled bulbs | $12–$25/each | Easy | Multiple bulbs, no smartphone needed | Yes |
| Diffuser materials & shades | $2–$15 | Easy | Exposed bulbs, decorative fixtures | Yes |
For those who eventually want a more permanent solution, installing a dedicated dimmer switch remains the gold standard. Our guide on how to install a dimmer switch walks through the full process step by step. But if you need a solution today — without tools or electricians — the methods below will get you there.
The method presented here is both easy and inexpensive. The concept is to place a semi-transparent sheet on or above the LED bulb/lamp which stops some of the emitted light. You won’t need wire or other appliances for this kind of dimming, all you do is take out the covering paper and stick it to the bulb or lamp.
Caution: Never put any substance in close touch with a lit LED light bulb. Although LEDs are cooler than traditional lamps, their heatsink may still be as hot as 80–100 °C, which can melt plastic materials and burn paper. Always place filters outside the fixture lens or beneath the lampshade.
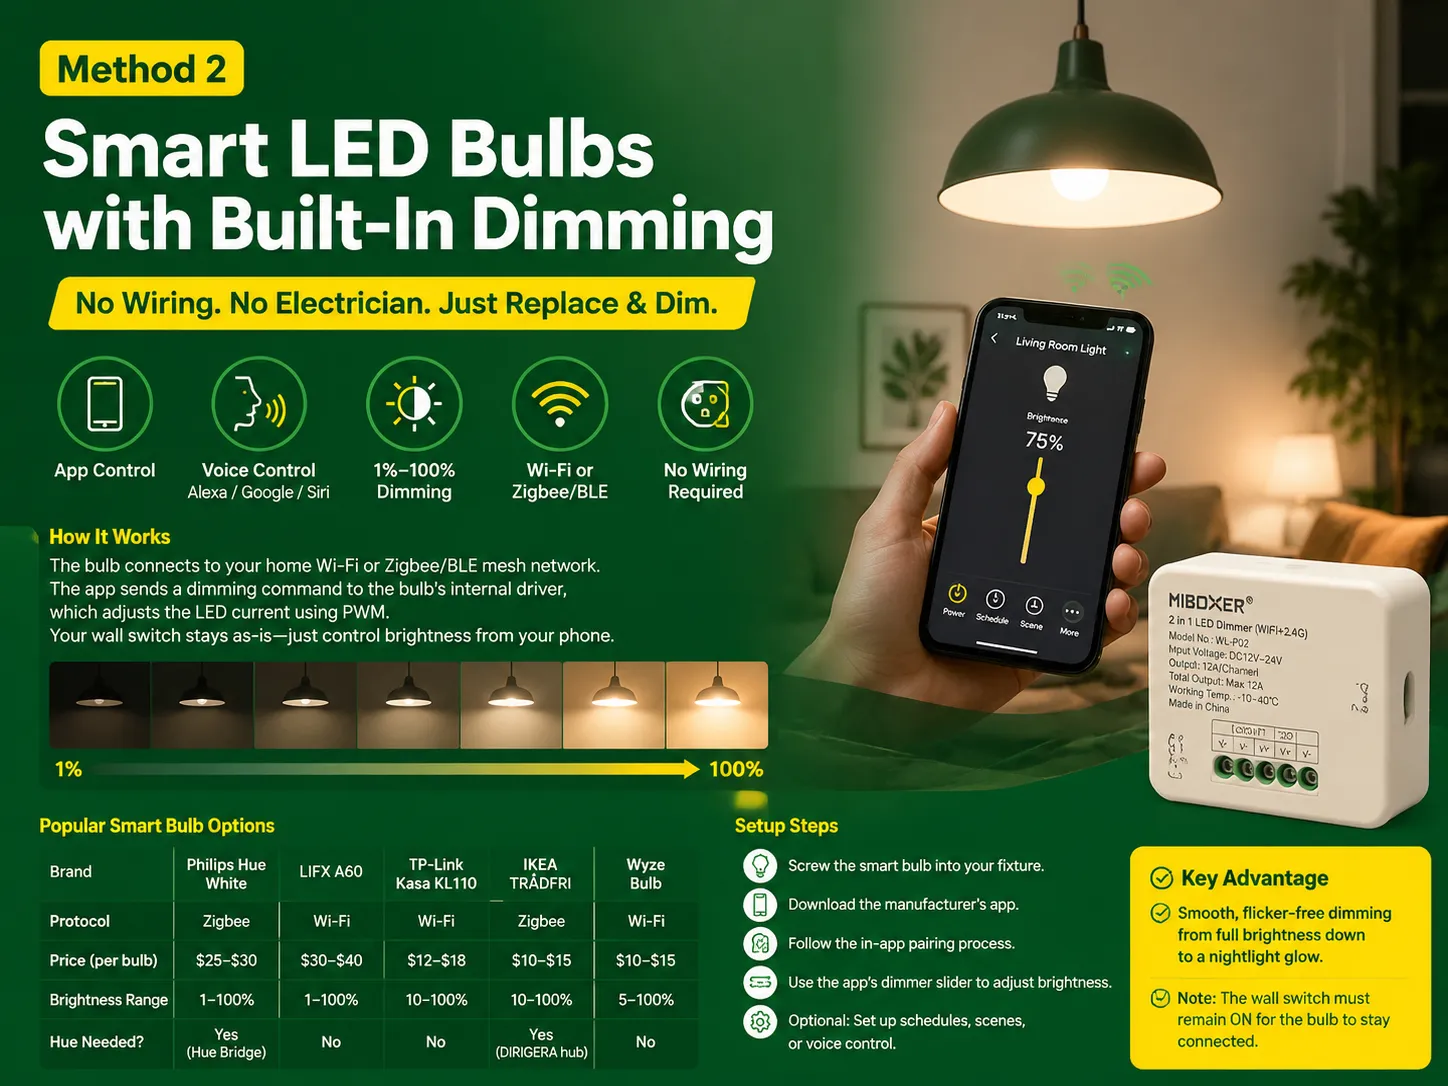
The best-known method of dimming without using wires is smart bulbs. They possess dimming circuits inside the bulb, which are controlled via smartphone app, voice-activated assistants (Alexa, Google, Siri), and through wireless remotes. All that has to be done is to replace the current light bulb as no switches have to be changed, thus, no electrician is needed and no wiring is required.
The light connects either to its own specific Wi-Fi network or to Zigbee/BLE one. A signal is sent from the app to the digital driver inside the bulb in order to adjust its brightness. As such, all you need to do is to turn on your switch и control the level of the brightness from your phone.
| Brand | Protocol | Price (per bulb) | Brightness Range | Hue Needed? |
|---|---|---|---|---|
| Philips Hue White | Zigbee | $25–$30 | 1–100% | Yes (Hue Bridge, ~$50) |
| LIFX A60 | Wi-Fi | $30–$40 | 1–100% | No |
| TP-Link Kasa KL110 | Wi-Fi | $12–$18 | 10–100% | No |
| IKEA TRÅDFRI | Zigbee | $10–$15 | 10–100% | Yes (DIRIGERA hub, ~$20) |
| Wyze Bulb | Wi-Fi | $10–$15 | 5–100% | No |
The main benefit is that you have a smooth dimming of the bulb without flickering. The disadvantage is that the switch must remain ON in order for the bulb to remain connected. If someone switches the wall off, the bulb is disconnected and when it is turned on again, it resets to the maximum brightness.If you want a wall-mounted dimmer that works with smart home systems, check out the WiFi Smart Curtain & Dimmer Switch from IGOTO, which supports app control and works with both 110V and 240V systems.
If you possess some lamps or lights that use a plug connection to the outlet, then the plug-in dimmer device could be the simplest answer for you. You just plug in the device, and then connect your lamp to the device. You can dim the brightness with help of the built-in slider, knob, or touch control.
The module is positioned between the wall socket and the light fixture. It consists of a triac dimmer circuit that cuts down the amount of electricity sent to the light. Some versions may come equipped with a remote control, a timer, or smart home features.
| Type | Price | Control Method | Max Load | Best For |
|---|---|---|---|---|
| Basic dial plug-in dimmer | $12–$18 | Rotary dial | 300–600W | Table lamps, simple setups |
| Touch dimmer plug | $15–$25 | Touch sensor | 400–600W | Modern look, easy adjustment |
| Smart plug with dimming | $20–$30 | App / voice / remote | 300–600W | Smart home integration |
| Inline cord dimmer | $8–$15 | Slider on cord | 300W | Permanently installed lamp cords |
Important: The bulb should be suitable for dimming. Dimmable LEDs can blink, buzz or not work with the deviceIf you’re shopping for a permanent wall dimmer instead, the FS328-V Dimmer (400W) with Switch is an SAA-certified option rated for Australian standard installations.
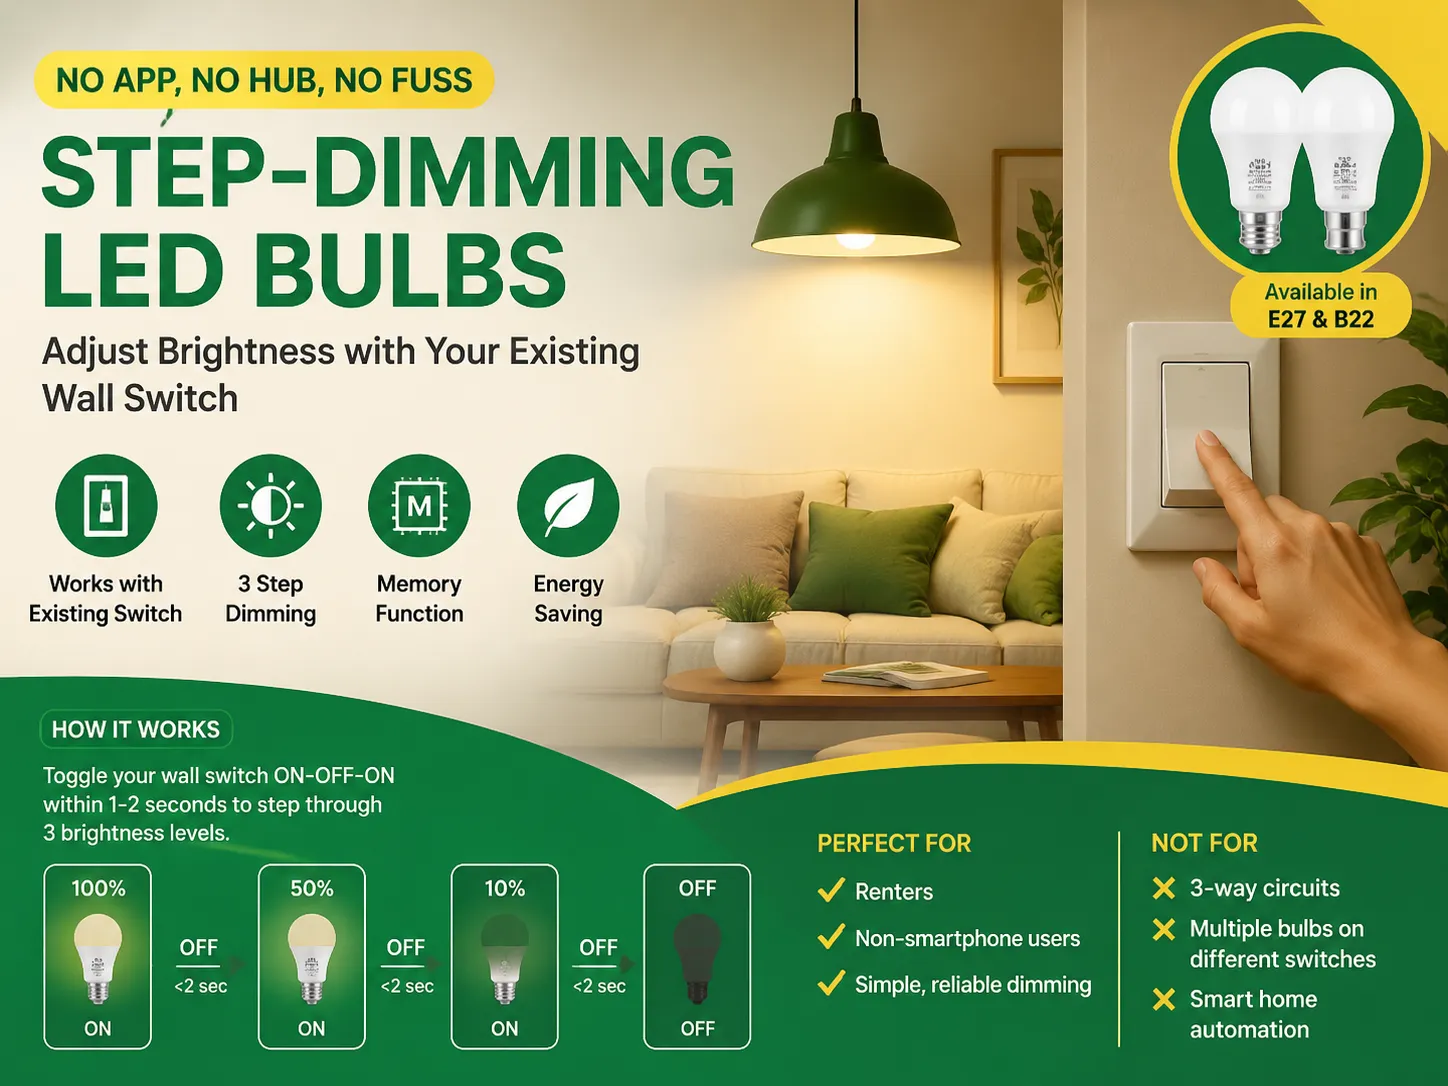
Dimming logic occurs directly in the driver of step-dimming bulbs. No special dimmer device or app is needed for their operation; their control is accomplished by using a simple standard wall switch. The light level is controlled by rapid switching through different brightness levels: either 100% → 50% → 10% → OFF or 100% → 40% → 10% → OFF.
Dimming logic occurs directly in the driver of step-dimming bulbs. No special dimmer device or app is needed for their operation; their control is accomplished by using a simple standard wall switch. The light level is controlled by rapid switching through different brightness levels: either 100% → 50% → 10% → OFF or 100% → 40% → 10% → OFF.
Ideal for: Those renting homes, individuals who do not own smartphones, anyone who requires dimming that does not come with mobile applications or other similar devices. Not suitable for: Three-way lighting, bulbs away from switches, or smart device.If you need more control options, learn about different kinds of switches in electrical to find what configuration fits your setup.
When dealing with LED strip lights (12V or 24V DC), you will be using PWM (Pulse Width Modulation) controllers, which are the normal dimming system for this kind of application. The PWM controller is a small device that is placed between the LED power supply and the LED strip. The PWM controller turns the LEDs on and off many times in a second to regulate the brightness of the LED strip.
PWM is not a voltage-changing mechanism; it is responsible for controlling duty cycle, i.e. the percent of the time the LED is ON or OFF for each cycle. In a duty cycle of 100%, the LED is ON all the time. At 50% duty cycle, it is ON half of the time, making the LED only half bright. As switching frequency is 200-1000 Hz, which is well above the perception of human eye flickering, dimming effect looks continuous.
| Controller Type | Price | Control Method | Best For |
|---|---|---|---|
| Basic PWM knob controller | $5–$10 | Rotary knob | Simple installations, under-cabinet |
| RF wireless PWM controller | $8–$15 | RF remote (30m range) | Hard-to-reach strips, ceiling coves |
| Wi-Fi PWM controller | $12–$20 | App / voice | Smart home integration |
| Bluetooth PWM controller | $10–$18 | Phone (Bluetooth) | No hub needed, local control |
The main benefit of PWM method is that it is the most effective way to dim the light. There is practically no energy wasted in form of heat, and the color temperature of LED is preserved regardless of dimming level. The main disadvantage of this technology is that the pwm dimmer cannot be used for regular AC (120V/230V) LED bulbs.
The LED bulbs in question come equipped with their own exclusive wireless remote. Unlike smart bulbs that use an app and Wi-Fi, remote-controlled bulbs use a simple RF (radio frequency) remote control that just works without any configuration, internet, or smartphone.
A radio frequency receiver has been integrated into the bulb. Using a remote, one can control the brightness and, in some case, color temperature based on specifications of the bulb. By utilizing a single remote control, it is possible to control a number of bulbs in a room.
That’s it. No app, no pairing, no Wi-Fi. For buyers who want a more integrated solution, the G6-119 EU Standard Dimmer Switch from IGOTO offers a wall-mounted 400W dimmer with an aluminum faceplate — ideal for European standard installations where a permanent dimming solution is preferred.
At times, switching to either a different lighting source or a completely different method of illuminating may be the easiest option. Diffuser material acts by scattering the light and making it less harsh without any changes in the electrical structure.
For static cling film method: cut to size, spray water on the surface, apply the film to the surface, and remove air bubbles using a squeegee. For spray coating procedure: clean the glass, cover the area where frosting is not desired, apply two or three thin layers, let dry for 24 hours.
Best suited for: Decorative fixtures requiring softer light distribution and lower intensity. Not suitable for: Circumstances where precise control of brightness is needed as diffusers only provide set reduction in brightness rather than allowing for dimming adjustments.
| Your Situation | Best Method | Why |
|---|---|---|
| Renting, can’t change wiring | Smart bulbs or plug-in dimmer | Zero wiring changes, fully reversible |
| On a tight budget ($5–$15) | Physical filters or inline cord dimmer | Cheapest options, instant results |
| Want smartphone/voice control | Smart LED bulbs (Wi-Fi) | App dimming, schedules, scenes |
| Don’t want apps, just simpler control | Step-dimming bulbs or remote bulbs | Use existing switch or a simple remote |
| LED strip lights (12V/24V) | PWM controller | Standard dimming method for strips |
| Table lamp or floor lamp | Plug-in dimmer module | Plug-and-play, no bulb change needed |
| Decorative fixture with bare bulbs | Diffuser materials & shades | Softer light distribution + reduced intensity |
| Multiple bulbs, one room | Smart bulbs (grouped) or RF remote kit | Control all bulbs together from one app/remote |
Dimming LED lighting without having a dedicated dimmable switch is, for the most part, safe, although compliance with a few important stipulations is necessary. Here are the most important rules of safety.
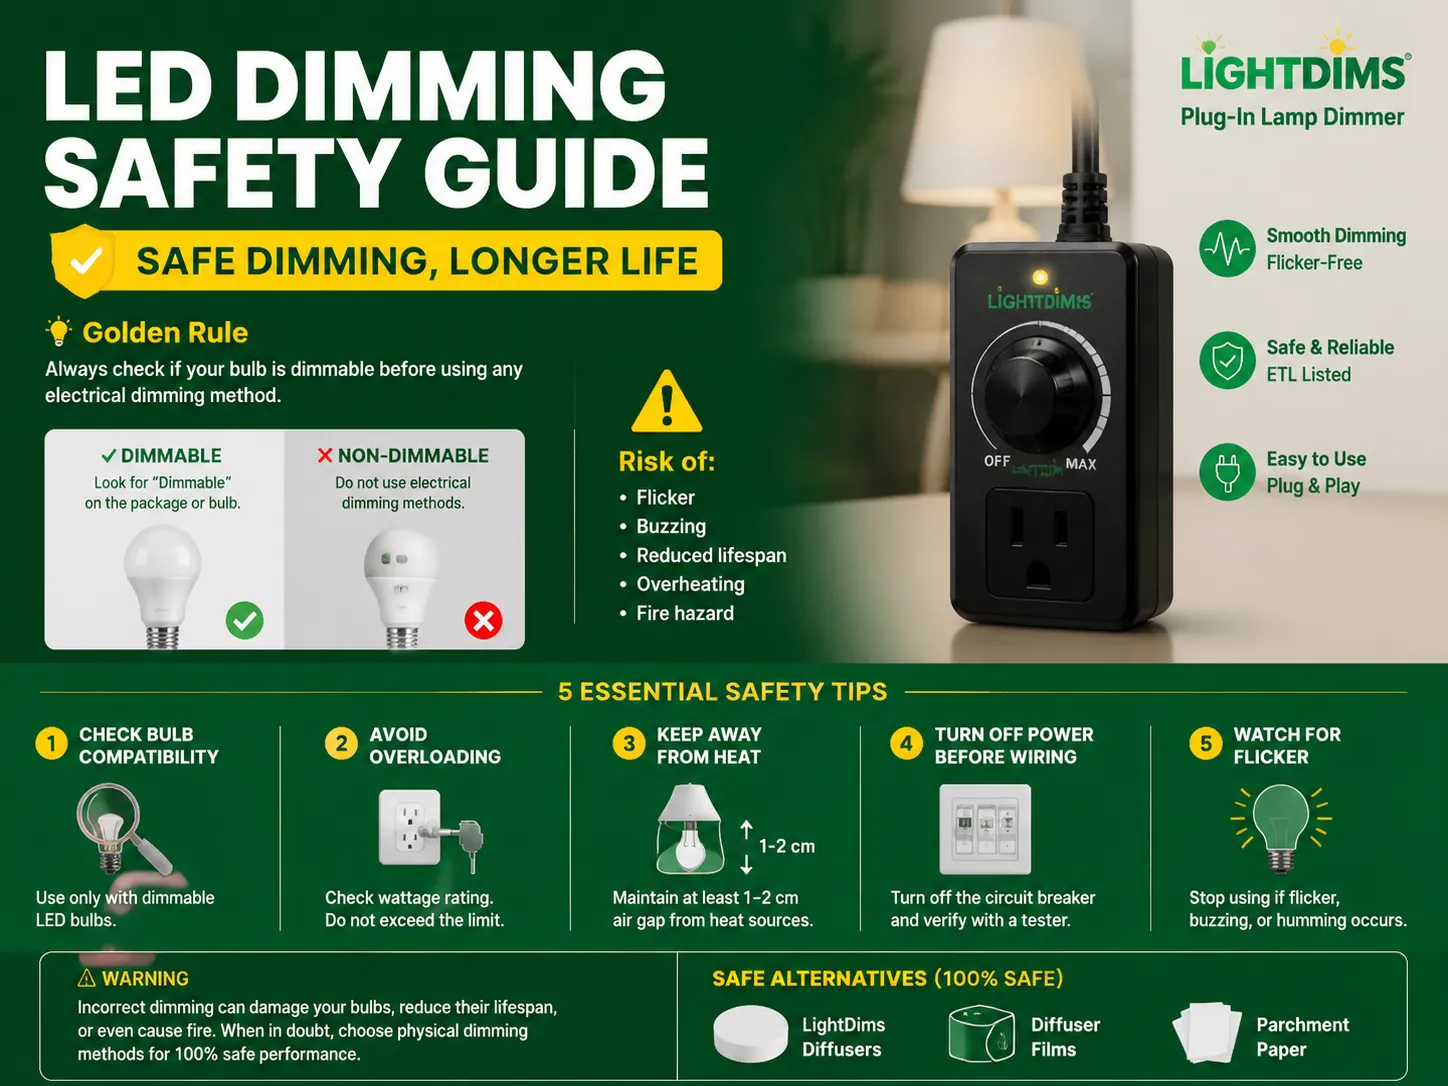
Make this your first priority. Check the packaging of the bulb to see whether it mentions the word ‘dimmable.’ If it does not mention the ‘dimmable’ feature then the bulb is not suitable for dimming. Using a non-dimmable LED with any of the electrical dimming options (plug-in dimmer, PWM, and resistors) can lead to:
Physical filters (LightDims, diffuser films, parchment paper) can be safely used with any type of bulb as they do not affect the electrical supply to the bulb
Verify the wattage rating of the dimmer module. If it reads “300W max,” do not plug in a lamp with a bulb rated at 350W. Overloading can melt the module shell, trigger your breaker or cause a fire. The majority of household LED bulbs consume 8 to 15W each; therefore, the 300W dimmer could effectively handle anywhere from 20 to 30 LED bulbs on one lamp circuit — although it’s best to verify.
While LEDs are cooler than incandescent lights, the heat sink at the back of an LED could still reach 80–100°C. Do not place parchment paper, plastics, or fabric directly onto a hot light. If using dimming materials, ensure that they are placed on the fixture lens or lampshade and that there is an air gap of at least 1–2 cm between the material and the source of light.
If you will install a PWM controller on LED strips or an inline dimmer, disconnect the power at the source before starting the installation. Don’t just switch off the wall switch. Turn off the circuit breaker for that circuit. Use a voltage tester before touching any wires.
If your LED bulb starts flickering when you turn it down, you should refrain from dimming it. Flickering can means that the dimming method you’re using is not compatible with the driver of the light bulb. The flickering could cause headaches, cause eye strain, and could trigger seizures in sensitive people.
| Symptom | Likely Cause | What to Do |
|---|---|---|
| Bulb flickers at low brightness | Incompatible dimming method | Switch to smart bulb or step-dimming bulb |
| Bulb buzzes or hums | Driver resonance with dimmer | Stop using that dimmer; use physical filter instead |
| Bulb won’t turn on after dimming | Driver locked up | Turn off power for 30 seconds, then turn back on |
| Dimmer module gets hot | Overloaded or poor quality | Unplug immediately; check wattage rating |
| LED strip flickers with PWM | Bad connection or wrong frequency | Check polarity; try a different PWM frequency (400+ Hz) |
If your present LED bulb does not have ‘dimmable’ written on it, you have two options to dim it:
The use of resistors, PWM dimmers, or a simple plug-in dimmer is not a good idea, as it can lead to problems with the LED’s internal driver. It might simply be overwhelmed by the pulse signal.
Indeed. You are able to make LED lights dim without having a wall dimmer with certain things including: the physical light dimmer filters (LightDims, diffuser films, parchment paper), the smart LED bulbs with dimming from the app, the plug-in dimmer modules for the lamps, step-dimming bulbs that react to toggling of the switch, PWM and other dimming controllers, the remote-controlled dimmable bulbs, and the light dimming filters. The only necessary condition is that the bulb is named “dimmable” before applying any method of dimming. The physical filters are compatible with all kinds of bulbs.
The best materials to dim light-emitting diodes (LED) are LightDims adhesive dimming sheets ($5-$12), neutral density filter sheets obtained at photography shops ($8-$15), frosted diffuser films ($3-$10), and wrapping paper as a cheap solution. Any of these materials should be applied to the fixture lens or lampshade and never directly on the bulb. Always make sure that there is at least 1 or 2 centimeters of air gap between the LED light and the material to avoid overheating. Fabric lampshades and frosted glass replacement covers can also effectively reduce the amount of light by 40% to 60%.
By placing a physical dimming filter like LightDims over the lens of the fixture, one can achieve simple dimming in 30 seconds and for under $10. For those requiring adjustable control, one can simply change the bulb for a smart LED bulb (cost anywhere between $10 to $30) and control the brightness through the app. For lamps that are plugged into a socket, a plug-in dimming module can be used (cost between $12 to $30), which makes it possible to control the brightness of the lamp without changing the bulb. If LED strip lights are used, then a PWM controller ($5 to $20) can be installed to be able to dim the lights.
The non-dimmable LEDs cannot be dimmed legally with the help of any electrical means (plug-in dimmer, PWM, resistor). Any attempts will result in flickering, buzzing, damaging the driver, or even creating fire hazards. The only legal methods of dimming non-dimmable LEDs are manual such as LightDims dimming sheets, diffuser films, frosted glass covers, and fabric lampshades. These dimming methods reduce the light output by blocking and scattering photons but not interfering with electricity. Alternatively, a more permanent solution is to substitute the non-dimmable bulb with the LED bulb labeled “dimmable,” with the price difference often being as low as 1 to 3 dollars per bulb.
Dimming LED lights without the use of a dimmer switch is feasible and often even more accessible than installing one. There are several ways to dim your LEDs:
Note: always check that your lamp is marked “dimmable” before using any of these methods (physical filters are an exception — they can be used safely with any kind of lamp).

The term “07984 lighting consultants” gives people the impression that the five digits represent a postal code of some sort that indicates the place where lighting consultants provide services. This is, however, incorrect: there is no postal area coded 07984, which is only a code of mobile telecommunications in Great Britain. This means that the […]

San Francisco is not the average lighting control market. The housing stock is old and dense, and the electrical code does not allow for as many electrical installations as is allowed almost anywhere else in the U.S. Most homes that want complex lighting are Victorian or Edwardian buildings where no one wants to start opening […]
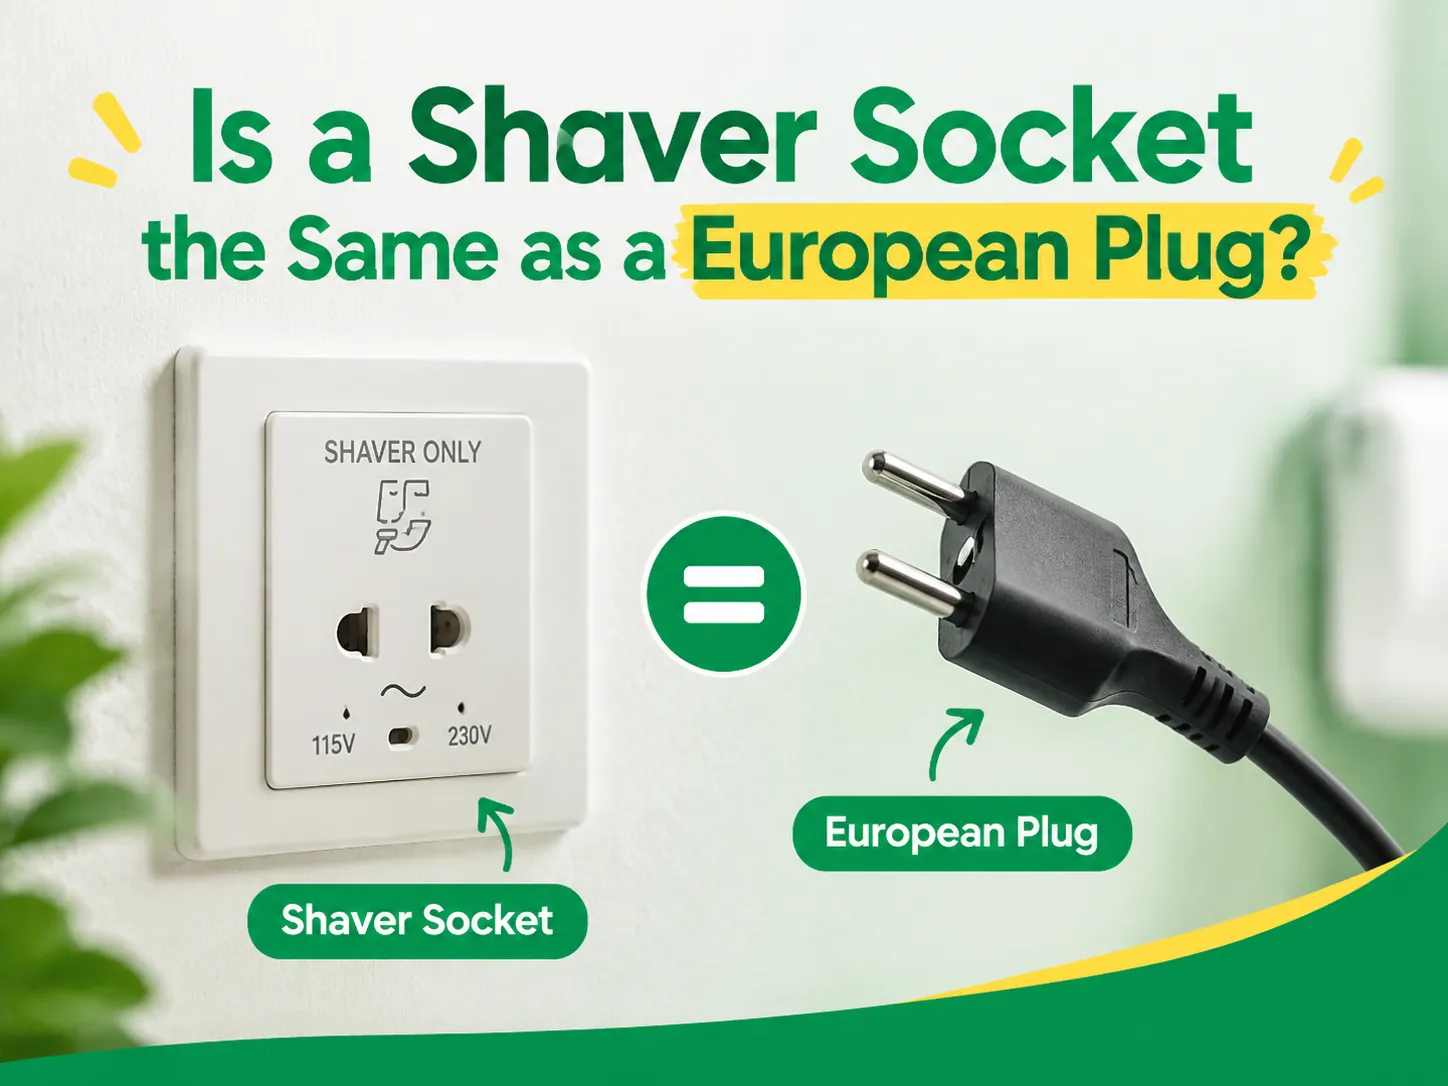
Although they seem to be alike, they both have a round shape with two pins, and they function at a voltage of 230V. This explains why some tourists use a European plug with a British shaver or wonder why a shaver cannot be plugged into a Schuko socket in a Spanish hotel. In reality, they […]

 No.6 Tuozhan Road, Leshang Pioneer Park,Yueqingwan Bay Harbor,Yueqing city,Zhejiang Province


